
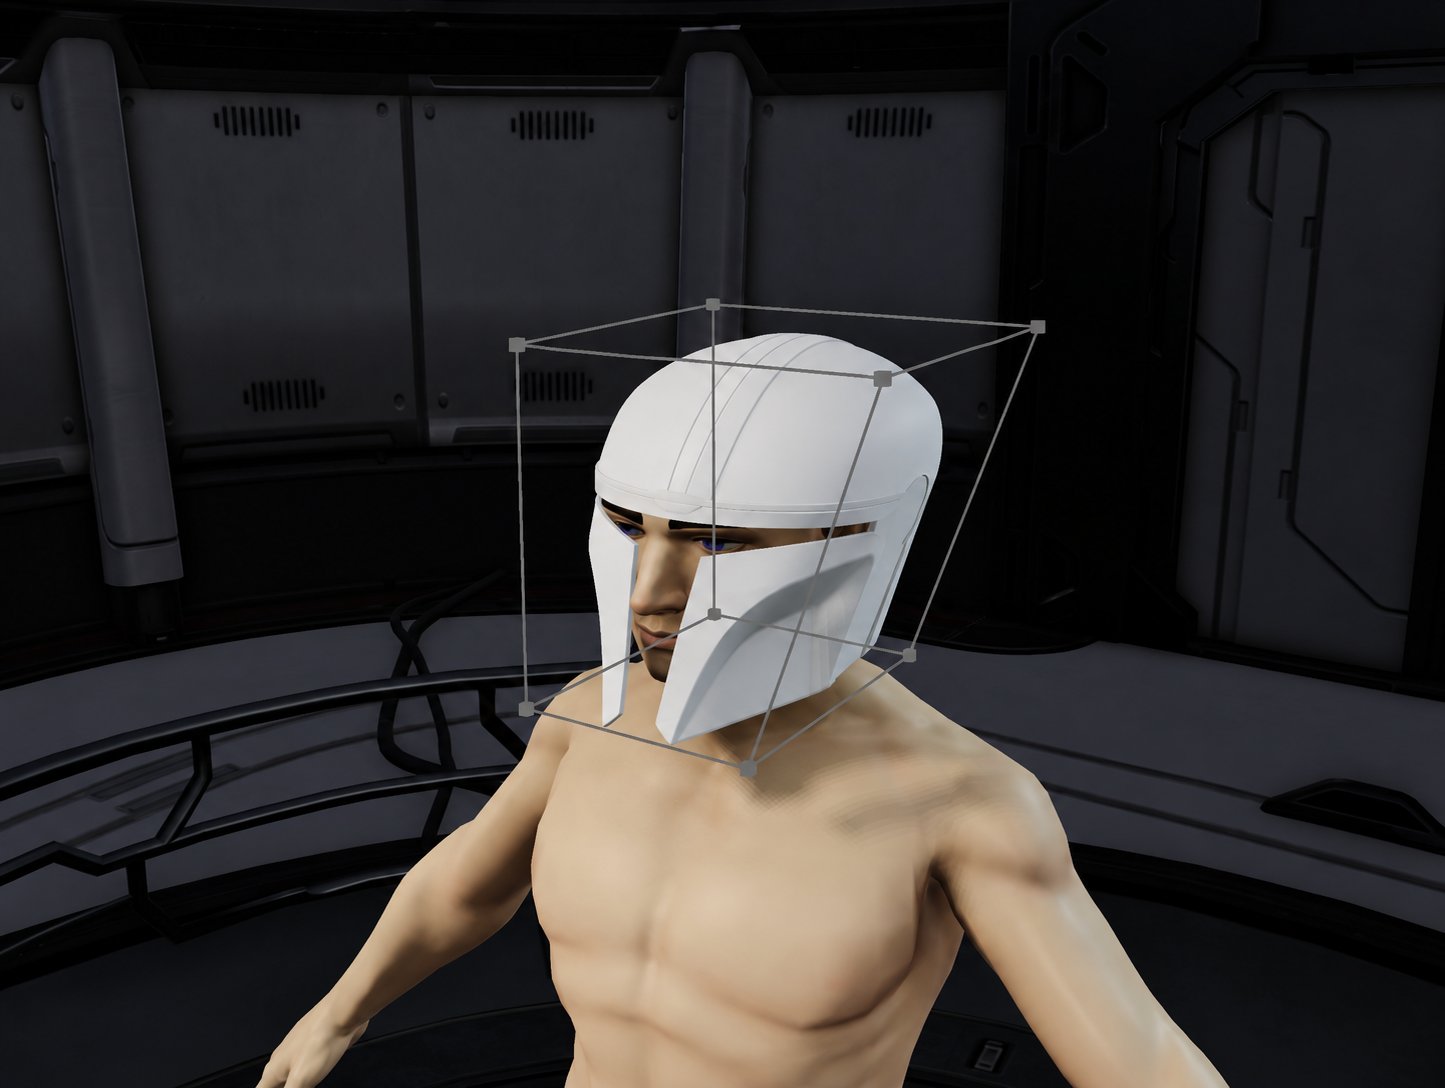
A helmet surrounded by an FFD cage. The square handles are control points you can select and move.
Activate the tool
- Left-click a costume part in the Costume Viewport to select it.
- Click FFD Tool in the toolbar above the viewport. You can also right-click the selected part and choose Free Form Deformation.
- In the Free Form Deformation dialog, choose Width, Height, and Depth for the cage.
- Click Apply to create the cage around the part.
Choose the cage resolution
Width, Height, and Depth specify the number of control points along each cage axis. Each value can be from 2 to 20, and the default is 2 on every axis.These values control the cage resolution. They are not measurements of the part’s width, height, or depth.
Select and move the cage
- Left-click a square control point to select it.
- Activate Translate, or press T.
- Drag a translation handle to move the selected point. The mesh follows the cage as you adjust it.
- Orbit the view and check the result before making another adjustment.
Example: flare the lower edge of a helmet
- Position and scale the helmet on your avatar before activating FFD.
- Start with a 2 × 2 × 2 cage.
- Select a lower control point and move it outward slightly with Translate.
- Adjust the corresponding point on the other side if you want a balanced shape.
- Inspect the helmet from the front, side, and back. Check clearance around the head and neck, and refine the lower points as needed.